Last updated: August 13, 2026
Clay pebbles look self-explanatory, a bag of baked clay balls, pour and go. Then the first reservoir turns rust-red, a seedling dries out inside a pot full of damp pebbles, and it becomes clear there is a right order of operations. Learning how to use clay pebbles for plants takes about ten minutes, and it saves every run that comes after.
This guide is the hands-on routine: preparing a new bag, planting into pebbles in a hydroponic net pot, using them for semi-hydro houseplants, and cleaning them for reuse. If you want the material science and the trade-offs first, start with our overview of clay pebbles in hydroponics and come back for the steps.
This article contains affiliate links. If you buy through them, we may earn a commission at no extra cost to you. Learn more.
Quick Answer
How do you use clay pebbles for plants?
- Rinse new pebbles until the water runs clear, then soak them so they wick from the first day.
- Never bury seeds or bare stems directly: start plants in a plug or cube, then nest the plug in pebbles.
- Between uses, strip roots, wash, and sanitize; the same pebbles serve for years.
The Step by Step Routine
Six steps take you from a new bag to a planted pot, and they apply whether the destination is a Kratky jar, a DWC bucket, or a houseplant cache pot. Save this list; steps 1 and 2 are the ones everyone skips and regrets.
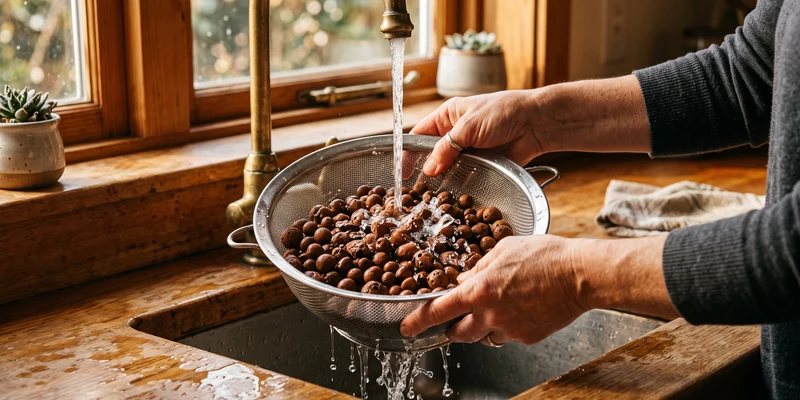
- Rinse until clear. Pour the pebbles into a bucket or colander and rinse under running water, stirring by hand, until no more red dust clouds off. Expect several changes of water for a fresh bag.
- Soak overnight. Cover the rinsed pebbles with water for 6 to 24 hours. Soaked pebbles wick moisture immediately and stop stealing water from a new transplant.
- Fill the base. Add a layer of pebbles to the bottom third of your net pot or planter, enough for the plug or root mass to sit at the right height.
- Set the plant. Place the seedling plug, rooted cutting, or washed-root houseplant in the center. In a net pot, the top of the plug should sit just below the rim.
- Backfill gently. Pour pebbles around the plant until it stands firm. Do not press hard; the weight of the pebbles does the anchoring.
- Water in and place. For hydro systems, set the pot so the solution reaches the base of the pebbles or plug at the start. For houseplants, add water to the reservoir line of the cache pot, keeping the plant’s crown dry.
All of it starts with the bag itself, sold as clay pebbles, LECA, or hydroton depending on the brand.

Using Clay Pebbles in a Hydroponic System
In hydroponics, pebbles fill the net pot and act as collar and scaffold: they hold the stem, shade the reservoir, and let roots pass through into the solution. The plant does not feed from the pebbles at all, which is exactly why the setup is so predictable.
Height is the detail that matters. In a passive Kratky jar or tote, the starting solution should just kiss the bottom of the net pot so the plug stays moist while roots reach down; in an aerated DWC bucket, bubbles splash the pot base and do that job for you. Pick a pot size with enough pebble volume to anchor the mature plant, not the seedling; our net pots guide matches sizes to crops, and the Kratky method guide covers the water line in passive builds.
Having a multipack of pots on hand makes that sizing call easier, since a mature plant wants more pebble volume than the seedling suggested.

Starting seeds the smart way
Seeds and loose pebbles are a poor match: small seeds vanish into the gaps and dry out. Germinate in a starter plug, rockwool cube, or a damp paper towel first, then transplant the sprouted plug into the pebbles at step 4. Some growers do sprout large seeds like beans directly in a pebble-topped pot, but the plug route works for everything.
Using Clay Pebbles for Houseplants (Semi-Hydro)
Semi-hydro means growing a houseplant in pure clay pebbles with a small water reserve at the bottom of the pot instead of soil. The pebbles wick moisture up to the roots, air fills the gaps, and watering becomes topping up a visible reservoir instead of guessing at soil moisture.
To convert a plant, wash the old soil off the roots completely, trim anything dead, and pot into rinsed pebbles in a container with no drainage, keeping the water line at roughly the bottom quarter of the pot, below the main root mass. The first weeks are an adjustment period while the plant grows water roots, so expect some leaf complaint before it settles. Feed with a dilute hydroponic nutrient solution rather than plain water, since the pebbles supply nothing on their own.
Cleaning and Reusing Clay Pebbles
Reuse is the whole economy of clay pebbles, and it takes three moves: strip, wash, sanitize. Pull the old root material out by hand, dump the pebbles into a bucket, and rinse away loose debris.
Then sanitize with a soak in diluted hydrogen peroxide or a mild bleach solution, and rinse thoroughly until no smell remains. Sun-drying afterward is a nice extra. Pebbles wrapped in stubborn root mats can be composted or discarded; everything else goes back in the bag for next season. If a previous run ended with slimy, discolored roots, be extra strict on this step; our guide to DWC root rot explains what you are trying not to carry into the new season.
Common Mistakes to Avoid
- Skipping the rinse. One unwashed bag can cloud a reservoir and coat a pump in clay film. Rinse until the runoff is clear.
- Planting dry pebbles. Unsoaked pebbles pull moisture away from the plug for days. Soak first.
- Burying the crown. Piling pebbles over the plant’s crown keeps it wet and invites rot. Pebbles up to the crown, never over it.
- Feeding houseplants plain water. In semi-hydro there is no soil to feed the plant. A dilute nutrient solution is part of the deal.
- Reusing pebbles from a diseased run without sanitizing. Pathogens ride along on dirty media. Sanitize between plants, always.
Frequently Asked Questions
Do you have to rinse clay pebbles before use? Yes. New pebbles carry kiln dust that clouds water and coats equipment. Rinse until the water runs clear, and soak afterward for best wicking.
Can you plant directly into clay pebbles? Transplants and rooted cuttings, yes. Seeds do far better started in a plug or cube first, then nested into the pebbles once sprouted.
Do plants in clay pebbles need fertilizer? Yes. Pebbles are inert, so all feeding comes from a nutrient solution, whether in a full hydro system or a semi-hydro houseplant pot.
How often do you water houseplants in clay pebbles? You top up the reservoir when it runs low, often every one to two weeks indoors, rather than watering on a soil-style schedule. The visible water line removes the guesswork.
Can you mix clay pebbles with potting soil? You can use them for drainage layers or aeration, but mixed media loses the clean, inspectable quality that makes pure pebbles easy to manage.
The Bottom Line
Rinse, soak, plant into a plug, backfill, and keep the water line where the roots want it: that is the entire craft of using clay pebbles. Treat them as scaffolding rather than food, feed with a proper nutrient solution, and sanitize between runs. Do those things and one bag of pebbles will outlast most of the plants you grow in it.