Last updated: August 15, 2026
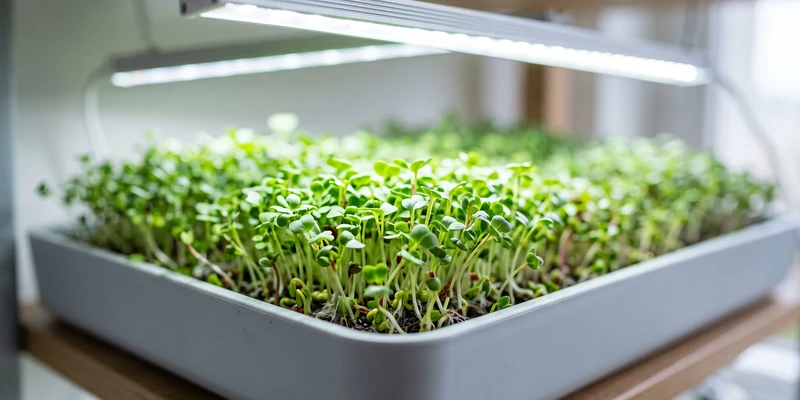
Microgreens are the friendliest crop in indoor growing, and the one where people most often overbuy their lighting. A tray of radish or pea shoots goes from seed to scissors in a week or two, never flowers, never fruits, and never asks for the kind of intensity a tomato demands. That makes the microgreens grow light question refreshingly cheap to answer: even, close, affordable light across a flat tray beats an expensive panel every time.
This guide covers what microgreens actually need from a light, why the blackout phase comes first, which fixture formats fit a shelf or a rack, and how to keep leggy, pale trays from happening again. Nothing here requires a dedicated grow room. A wire shelving unit in a spare corner is the classic setup for a reason.
This article contains affiliate links. If you buy through them, we may earn a commission at no extra cost to you. Learn more.
Quick Answer
What is the best grow light for microgreens?
- Linkable full spectrum LED strip lights or a simple LED shop light mounted above the tray, the cheapest format that covers a whole 10 by 20 tray evenly.
- Run them roughly 12 to 16 hours a day on a timer, starting after the blackout phase, not from day one.
- Hang strips close, commonly 6 to 12 inches above the canopy, and add a small fan; airflow prevents more problems than extra light ever will.
What Microgreens Ask From a Light
Microgreens are harvested at the seedling stage, usually within one to three weeks of sowing, so they never need the energy budget of a plant that has to build fruit. What they do need is uniform coverage, because a tray lit from one corner grows a lopsided crop that leans toward the bright side.
| Factor | What microgreens want | Practical translation |
|---|---|---|
| Light appetite | Modest; a seedling crop, not a fruiting one | Budget strip lights and shop lights are genuinely enough |
| Coverage | Even light corner to corner | Match fixture length to tray width; two strips beat one bright spot |
| Hours per day | Commonly 12 to 16 after the blackout phase | Set a timer once and forget the schedule exists |
| Distance | Close, because trays are flat and short | Roughly 6 to 12 inches for strips and shop lights |
| Spectrum | Full spectrum white is fine | Around 4000K to 6500K keeps greens looking their natural color |
| Blackout phase | Darkness first, light second | Most crops spend roughly 2 to 4 days covered before the light goes on |
| Signs it is working | Short stems, open green leaves, an even carpet | Pale, stretched, leaning trays mean more light or closer light |
The reason cheap fixtures work here is simple geometry. A microgreen canopy is flat and only a couple of inches tall, so almost all the light a strip produces lands on leaves. Deep canopies waste light on shaded lower branches, which is why fruiting crops need so much more of it.
Start in the Dark, Not Under the Light
Most microgreen crops begin with a blackout phase: the sown tray is covered, often with a second tray and a little weight, for roughly two to four days depending on the seed. Darkness and light pressure encourage even germination and drive the shoots upward together, which is what gives you a uniform carpet rather than a patchy one.
When to uncover
Growers typically uncover when the shoots have lifted the top tray slightly and stems are reaching, at which point the seedlings are pale yellow. That is normal. Within a day or two under light they green up as chlorophyll develops, and stems stop stretching. Larger seeds such as sunflower and pea commonly spend longer in blackout than fine seeds like broccoli or arugula.
Seeds are not all the same on this point, and a few crops prefer light from the start, so follow the guidance that comes with the seed if it disagrees with a general rule. The general rule exists to be adjusted.
Which Type of Light Fits Your Setup?
Pick by how many trays you run and where they live. In microgreens, coverage per dollar matters far more than peak intensity.
One or two trays on a shelf
A pair of linkable full spectrum LED strip lights mounted under the shelf above is the standard answer, and brands like Barrina are the familiar name in that format. They daisy-chain, they clip or stick to almost any surface, and one plug can run a whole row. An LED shop light hung on chains does the same job with fewer parts. For comparing fixture formats generally, our guide to grow light bulbs versus fixtures covers where each shape makes sense.
Linkable T5 style strips are the format that fits a tray shelf most neatly:

A full rack of trays
Once you are running several trays a week, a wire shelving unit with a light layer on every shelf turns a corner into a small production line. Strips or shop lights per shelf, one timer for the whole rack, and trays that rotate through blackout, greening, and harvest. This is the setup most home growers land on, because it scales one shelf at a time.
Sharing a light with seedlings and herbs
Microgreens happily share a fixture with vegetable seedlings, since both want the same close, even, moderate light. If you already own a seed-starting setup, you probably already own a microgreens setup; the details are in our guide to the best grow light for seedlings. For panels and larger fixtures across all indoor uses, see our roundup of the best LED grow lights for indoor plants.
Hours, Distance, and the Timer
Microgreens commonly get 12 to 16 hours of light a day once uncovered. Longer schedules can speed things up slightly, but the crop is already fast, and there is little reason to push it. A dark period keeps the routine simple and the electricity bill modest. Our guide to how many hours of grow light plants need explains why the number varies by crop.
Distance is the lever that fixes legginess. Strips and shop lights commonly sit roughly 6 to 12 inches above the canopy for microgreens, closer than you would hang the same fixture over a mature plant. If stems are long and pale and the tray leans, lower the light or add a second strip before you consider anything else. Our grow light distance guide covers the ranges per fixture type.
Put it on a timer from day one
Microgreens are a repeating routine, and routines survive on automation. A basic outlet timer keeps every tray on the same schedule regardless of your week; our guide to grow light timers covers the simple mechanical and smart options. One practical note since trays, water, and electricity share a shelf here: keep cords in a drip loop below the fixture and use a GFCI outlet where you water.
Airflow, Water, and Clean Trays
Light is only one third of a good tray. Dense microgreen canopies hold moisture, and stagnant humid air is where fuzzy growth on the medium tends to show up. A small clip fan moving air across the shelf, watering from the bottom rather than over the leaves, and reasonable spacing between trays solve most of it.
Distinguish two things people often confuse: root hairs and mold. Fine white fuzz on the roots of young seedlings, disappearing under a light spray, is usually normal root hair. Cobwebby growth spreading across the medium and up the stems, often with a musty smell, is not, and that tray is best composted rather than rescued. Clean trays between runs, do not oversow, and keep the fan running.
Bottom watering needs the standard pairing of a drainage tray inside a solid one, which is how 10 by 20 tray sets are usually sold:

Sowing density matters more than light
Overcrowded trays trap moisture, block airflow, and produce weak stems no fixture can fix. Follow the seed density suggested for your crop, and if a tray keeps failing, sow lighter before you buy anything new.
Common Mistakes to Avoid
- Buying a fruiting-crop panel. Microgreens do not need that intensity. Spend the difference on more trays, seed, and a second shelf of strips.
- Skipping the blackout phase. Light from day one gives uneven germination and a patchy, short crop on many varieties.
- Hanging the light too high. The most common cause of long, pale, leaning stems. Lower it before you blame the seed.
- One narrow fixture over a wide tray. Corners stay dim and the crop grows lopsided. Cover the full tray width.
- Watering over the top. Wet leaves plus still air invites problems. Bottom watering keeps the canopy dry.
- Sowing too thickly. Density feels productive and produces weak, crowded stems. Less seed, better trays.
Where to Go From Here
Microgreens are the best possible on-ramp to indoor growing: a one-week feedback loop, almost no equipment, and a harvest you actually use. Once the routine clicks, the same shelf and the same lights start vegetable seedlings in spring and keep a kitchen herb setup going all winter.
If you are deciding between fixtures and getting lost in spectrum claims on the boxes, our explainer on what full spectrum really means translates the marketing language into what matters for a tray of greens.
Frequently Asked Questions
Do microgreens need a special grow light? No. Full spectrum LED strip lights or a basic LED shop light cover a tray evenly and are the common choice. Microgreens are a seedling crop and do not need fruiting-level intensity.
How many hours of light do microgreens need? Commonly 12 to 16 hours a day once the blackout phase ends, with a dark period each night. A cheap outlet timer keeps every tray consistent.
How close should the light be to microgreens? Roughly 6 to 12 inches above the canopy for strips and shop lights. Long pale stems that lean mean the light is too far away or too weak.
Can microgreens grow without any grow light? A bright windowsill can work for a tray or two, but light comes from one direction, so the crop leans and stretches. A fixture overhead gives a far more even result.
Why are my microgreens tall and pale? Almost always insufficient or distant light after uncovering, sometimes combined with sowing too thickly. Lower the fixture, extend the schedule, and sow a little lighter next round.
Do microgreens need light during germination? Most crops spend roughly two to four days in blackout first, which encourages even germination. Uncover when shoots are reaching, then start the light schedule.
The Bottom Line
Microgreens are the one crop where the cheap lighting answer is also the right one: linkable full spectrum strips or an LED shop light, hung close and covering the full tray, running 12 to 16 hours a day on a timer. Start in blackout, uncover when shoots reach, and add a small fan for airflow. Spend what you save on more trays and more seed.
See what microgreens need from a light