Last updated: August 13, 2026
You do not need a boxed kit to grow food in water. A do it yourself hydroponic system can be as small as a mason jar on a windowsill or as capable as a row of connected buckets feeding tomato plants taller than you are, and almost every part comes from a hardware store or an aquarium aisle. The method is the same in every case: roots sit in a nutrient solution instead of soil, and your job is to give them water, food, and oxygen.
This guide walks through seven proven builds, ordered roughly from cheapest and easiest to most involved. For each one you get the core idea, the parts in plain language, and an honest note on effort, so you can pick the build that matches your space, your budget, and your patience.
This article contains affiliate links. If you buy through them, we may earn a commission at no extra cost to you. Learn more.
Quick Answer
Which DIY hydroponic system should you build first?
- For a zero-equipment first try, build a Kratky mason jar: no pump, no electricity, one head of lettuce or a basil plant per jar.
- For the best balance of cost and capability, build a 5-gallon DWC bucket with a small air pump; it can carry a full-size tomato or pepper plant.
- Save NFT channels, Dutch buckets, and vertical towers for round two, once you have mixed nutrients and checked pH a few times.
The Seven Builds at a Glance
Seven builds cover nearly everything home growers do with DIY hydroponics. The first two are passive and need no electricity, the middle two add an air pump, and the last three circulate water with a small pump. Match the build to what you want to grow, not the other way around.
| Build | Cost and effort | Skill level | Best for |
|---|---|---|---|
| 1. Kratky mason jar | Very low, one evening | Beginner | Herbs, one lettuce head, a first try |
| 2. Kratky storage tote | Low, one evening | Beginner | Four to eight lettuce heads at once |
| 3. 5-gallon DWC bucket | Low, a weekend morning | Beginner | One big plant: tomato, pepper, cucumber |
| 4. Recirculating DWC | Medium, a weekend | Intermediate | Several large plants on one reservoir |
| 5. PVC NFT channels | Medium, a weekend | Intermediate | Lots of lettuce and leafy greens |
| 6. Dutch buckets | Medium, a weekend | Intermediate | Vining crops trained up strings |
| 7. Vertical PVC tower | Medium, several sessions | Advanced | Strawberries and greens in tight spaces |
Builds 1 and 2: Passive Kratky, No Pump Required
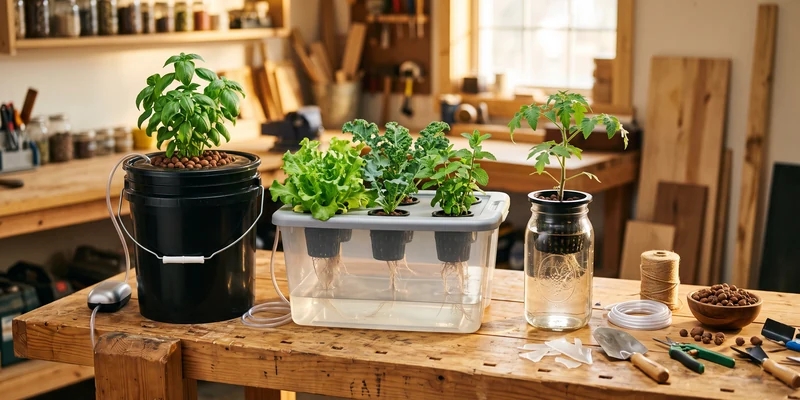
The Kratky method is the cheapest working hydroponic system there is: a container of nutrient solution, a net pot in the lid, and nothing else. As the plant drinks, the water level drops and leaves a growing air gap where roots take up oxygen. No pump, no electricity, no moving parts.
Build 1: the mason jar
A wide-mouth jar, a net pot that sits in the mouth, a handful of clay pebbles, and a sleeve or paint layer to keep light out of the solution. That last part matters, because light plus nutrients equals algae. One jar grows one head of lettuce or one basil plant from start to harvest. The full walkthrough lives in our guide to Kratky in mason jars.
Build 2: the storage tote
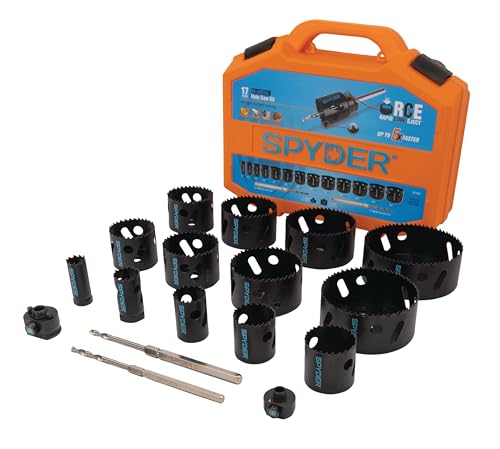
Scale the same idea up with an opaque storage tote. Drill four to eight holes in the lid, drop in net pots, fill with solution, and you have a lettuce bed that runs for weeks untouched. Choose a dark, sturdy tote so the sides do not bow or let light through. How the air gap works, and why you should not top the tote back up in a classic Kratky run, is covered in our Kratky method guide.
A hole saw sized to your net pot lip is what makes those lid cuts clean and repeatable, and the same bit serves every build further down this list.
Builds 3 and 4: Deep Water Culture Around the Humble Bucket
Deep water culture, or DWC, keeps roots submerged in aerated solution full time. An aquarium air pump pushes air through a stone at the bottom of the container, oxygen stays high, and growth is noticeably faster than passive setups. This is the workhorse of DIY hydroponics.
Build 3: the 5-gallon DWC bucket
One bucket, one net pot lid, one air pump, one air stone, and airline tubing. That short list carries a full-size tomato, pepper, or cucumber plant. It is the build we recommend most often because every part is cheap, replaceable, and easy to understand. Follow the step by step in our 5-gallon DWC bucket setup, and read the theory in the complete DWC guide.
The air pump is the part worth choosing deliberately, since it runs around the clock and its output decides how much oxygen reaches the roots. A dual outlet model with adjustable flow feeds one bucket now and a second one later.

Build 4: recirculating DWC
Connect several buckets with bulkhead fittings and pipe, add a control bucket where you check pH and top off, and a small water pump to keep everything mixed. You maintain one reservoir instead of four, which is the whole point. The trade is complexity: more fittings means more places to leak, so test the plumbing with plain water for a day before planting. Any build with a pump mixes electricity and water, so plug it into a GFCI outlet and leave a drip loop in every cord.
Builds 5, 6, and 7: Circulating Systems for Bigger Ambitions
The last three builds move water continuously with a small pump on a timer or running full time. They cost more in parts and attention, and they reward you with density: more plants per square foot than any bucket can manage.
Build 5: PVC NFT channels
In a nutrient film technique system, a thin film of solution runs along the bottom of a slightly sloped channel, past the roots, and back to a reservoir. Square fence post or large-diameter PVC with holes cut for net pots is the classic DIY version. It excels at lettuce and greens, and it fails fast in a power outage because there is no water buffer around the roots. How the film works and what ready-made kits look like is covered in our NFT hydroponic systems guide.
Build 6: Dutch buckets
Dutch buckets, also called bato buckets, are individual containers filled with a medium such as perlite or clay pebbles, each fed by a drip line from a shared reservoir, with excess draining back through a common return pipe. They shine with big vining crops: tomatoes, cucumbers, and peppers trained up strings. Because each bucket stands alone, you can swap or service one plant without touching the rest.
Build 7: the vertical PVC tower
A tower packs the most plants into the least floor space by stacking planting sites up a vertical pipe while a pump lifts solution to the top and lets it trickle down over the roots. It is the most satisfying build on this list and the least forgiving: hole angles, flow rate, and even watering all take tuning. Save it for when the bucket feels easy. Our DIY hydroponic tower guide covers the full PVC build.
The Parts Every Build Shares
Whatever you build, the shopping list overlaps: net pots to hold the plants, an inert medium to steady the stems, nutrients, and a way to check pH. Getting these right matters more than the container around them.
Net pots come in sizes from 2 to 6 inches, and the right size depends on the crop and the lid you are cutting; our net pots guide explains what to look for. Most growers pair them with clay pebbles, which hold plants firmly while letting roots and air pass; see how they behave in clay pebbles in hydroponics. For feeding, a two-part liquid or a dry mix works in every build here, and the basics of NPK and A/B schedules are covered in our guide to hydroponic nutrients. Most leafy greens do well with a solution pH around 5.5 to 6.5, so budget for a simple pH kit or meter from day one.
A mixed pack of net pots covers the sizes these builds ask for, and the wide lip is what keeps each pot sitting neatly in a drilled lid.

Common Mistakes to Avoid
- Using a clear container. Light in the nutrient solution grows algae within days. Choose opaque containers or wrap and paint them.
- Starting with the hardest build. A tower that drips unevenly teaches you less than a bucket that just works. Climb the ladder in order.
- Skipping pH entirely. Nutrients lock out when pH drifts far from the happy range, and the plant shows it in the leaves. Check a few times a week at minimum.
- Undersizing the reservoir. Small volumes swing fast in temperature, pH, and strength. When in doubt, more water is more stability.
- Forgetting the outage plan. NFT and towers depend on the pump. Kratky and DWC buy you hours to days of buffer if the power fails.
Frequently Asked Questions
What is the cheapest DIY hydroponic system? A Kratky mason jar. A jar, a net pot, clay pebbles, and a small amount of nutrient mix grow a full head of lettuce with no pump or electricity involved.
Do I need a pump for DIY hydroponics? Not for Kratky builds, which use a fixed air gap instead of aeration. DWC, NFT, Dutch buckets, and towers all rely on a pump, either for air or for moving water.
What can I grow in a DIY hydroponic system? Lettuce, herbs, and leafy greens are the easy wins in every build. Tomatoes, peppers, and cucumbers want the bigger aerated builds, and strawberries take well to towers and Dutch buckets.
Is PVC safe for hydroponics? Rigid PVC is widely used in home and commercial hydroponics. Use uncoated food-contact-friendly pipe where you can, rinse new pipe well, and keep glue and primer on the outside of joints.
How long does a DIY build take? A jar takes an evening, a bucket takes a morning, and channel or tower systems typically take a weekend plus a few evenings of tuning flow and checking for leaks.
The Bottom Line
Start passive, then add air, then add circulation. A Kratky jar proves the concept for almost nothing, a 5-gallon DWC bucket grows serious food with one cheap pump, and NFT channels, Dutch buckets, and towers are there when you want density and scale. Every skill transfers from one build to the next, so the jar you plant this week is the first step toward the tower.