Last updated: August 13, 2026
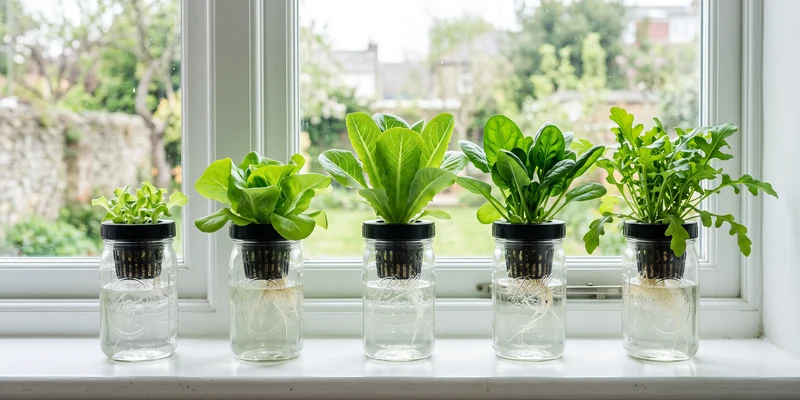
If you want to try hydroponics without buying a system, the Kratky method in mason jars is the cheapest possible entry point. A jar you may already own, a net pot, a scoop of nutrients, and a sunny windowsill or small grow light are the entire setup. No pump, no electricity, no plumbing, and nothing to break.
The method works because of a clever bit of plant biology: as the plant drinks, the water level falls, and the roots that are left exposed adapt to pull oxygen from the air. That means a sealed jar can carry a lettuce head or a basil plant from seedling to harvest without you touching it. This guide walks through the full setup step by step, plus the two details that decide whether your first jar thrives or turns green with algae.
This article contains affiliate links. If you buy through them, we may earn a commission at no extra cost to you. Learn more.
Quick Answer
How do you grow with the Kratky method in a mason jar?
- Fill a wide mouth quart jar with nutrient solution, drop a 3 inch net pot with a seedling into the mouth, and let the falling water level create the air gap the roots need.
- Block all light from the jar, with paint, a sleeve, or fabric, or algae will take over the solution.
- Leafy greens and soft herbs like lettuce, basil, and mint fit the jar size best; large fruiting plants outgrow it.
Kratky Mason Jar Setup, Step by Step
The whole build takes about fifteen minutes once your seedling is ready. Here is what you need and what to do, in order.
| Item | What to use | Notes |
|---|---|---|
| Jar | Wide mouth quart (32 oz) mason jar | Wide mouth jars fit a 3 inch net pot almost perfectly |
| Net pot | 3 inch net pot | Sits in the jar mouth; see our net pots guide for sizes |
| Grow medium | Rockwool cube or clay pebbles | Starts the seed and anchors the seedling |
| Nutrients | Hydroponic nutrients, powder or liquid | Regular soil fertilizer is missing key minerals |
| Light block | Paint, aluminum foil, a sock, or a koozie | Any opaque cover works; this step is not optional |
| Light | Bright windowsill or a small grow light | Leafy greens generally want around 12 to 16 hours per day |
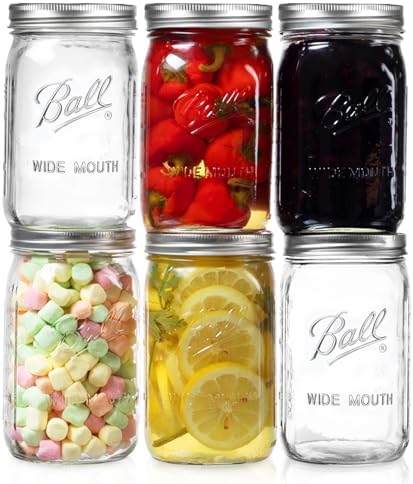
If you are starting from nothing, the jar is the only piece worth buying in quantity. Wide mouth quart jars are sold by the case, and a case is enough to keep several plants running on a rolling schedule.
- Start your seed. Sow it in a moist rockwool cube or a damp paper towel. Lettuce typically sprouts in around 2 to 7 days; basil often takes around 5 to 10.
- Black out the jar. Paint the outside, wrap it in foil or duct tape, or slide it into a thick sock. Leave a thin vertical viewing strip if you want to check the water level, and cover that strip when you are not looking.
- Mix the nutrient solution. Follow the label rate for your product, scaled down to one quart. Most leafy greens do well at a pH of around 5.5 to 6.5, which many tap water sources land near without adjustment.
- Fill the jar. Pour solution up to the point where it just touches the bottom quarter of the net pot. The medium wicks moisture up to the young roots.
- Place the seedling. Set the rockwool cube in the net pot and surround it with clay pebbles for stability, then rest the net pot in the jar mouth.
- Give it light. A south facing window can work, though a small grow light is far more consistent, especially in winter.
- Leave it alone. This is the strange part for new growers: in a true Kratky setup you do not top off the water. The falling level is the design, not a problem.
Balancing a loose net pot in the jar mouth works, but net pot lids made for wide mouth jars are the tidier answer: the pot sits in a threaded ring, the fit is snug, and less light sneaks into the solution around the edges.

Why the Air Gap Is the Whole Trick
Roots need both water and oxygen, and the Kratky method delivers both without a pump by letting the water level drop. As the plant drinks, a humid air gap opens between the solution and the net pot, and the upper roots adapt into air roots that handle oxygen while the lower roots keep drinking. Refilling the jar to the top drowns those air roots, which is why topping off is the most common beginner mistake.
This is the same principle behind every passive hydroponic setup, just scaled down to a quart. If you want the deeper theory, including how to size containers so the water lasts exactly one crop cycle, our full Kratky method guide covers it. The short version for jars: a quart of solution is typically enough to carry one leafy plant to harvest with no refill at all.
Blocking Light: The Step Everyone Skips
A clear jar full of nutrient solution in a bright window is a perfect algae incubator. Algae itself will not usually kill the plant, but it competes for nutrients, consumes oxygen, coats the roots, and can invite fungus gnats. A jar that turns green within a week almost always traces back to light hitting the solution.
Easy ways to black out a jar
Growers use whatever is on hand: exterior spray paint (two coats, plus a top coat of white or a light color so the jar does not overheat in the sun), aluminum foil, duct tape, a thick sock, or a neoprene koozie made for wide mouth jars. Dark amber jars help but usually still let enough light through, so treat them the same. Whatever you choose, cover the gap around the net pot too if the fit is loose.
What Grows Well in a Quart Jar
Match the plant to the water supply and the answer is simple: quick, leafy crops thrive, and big fruiting plants do not. One quart of solution is a small tank, so the sweet spot is anything you can harvest within roughly 30 to 60 days of transplanting.
- Lettuce. The classic Kratky crop. Loose leaf varieties do especially well; our Kratky lettuce guide follows the whole cycle from seed to harvest.
- Basil, mint, and soft herbs. Basil grows fast and regrows after cutting; mint is nearly indestructible. Cut regularly so the plant does not outdrink the jar.
- Spinach, arugula, and Asian greens. Fast, compact, and happy at windowsill light levels.
- Skip tomatoes and peppers in jars. They can start in a quart but will empty it in days once they size up. They need a bucket or tote sized reservoir instead.
Mixing Nutrients at Jar Scale
Hydroponic nutrients are the one thing you cannot improvise, because the plant gets every mineral from the solution. A dry powder formulated for hydroponics, or a one part liquid, both work well at jar scale. Labels usually give rates per gallon, so divide by four for a quart jar and measure with measuring spoons rather than guessing.
Slightly weak solution is safer than slightly strong in a small jar, since there is no pump or drain to flush mistakes. Mix, stir, and if you have a meter, check that the pH sits around 5.5 to 6.5. For product recommendations that suit passive systems specifically, see our guide to the best nutrients for the Kratky method.
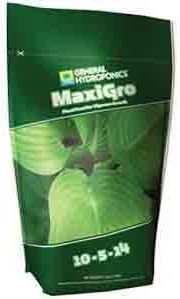
At jar scale, a single dry powder is the simplest route. General Hydroponics MaxiGro is the one-part option growers name most often for leafy crops: you measure a small dose, stir it in, and there is nothing left to mix or store wet.
Common Mistakes to Avoid
- Topping off the water. Refilling drowns the air roots the method depends on. Set it and leave it.
- Leaving the jar clear. Light plus nutrients equals algae, reliably and quickly.
- Filling too low at the start. If the solution never touches the net pot, a young seedling cannot reach it and dries out before roots grow down.
- Using regular houseplant fertilizer. Most soil fertilizers lack calcium and magnesium in usable form, and deficiencies show up within weeks.
- Planting something too big. A quart jar carries one leafy plant. Ambition is what buckets are for.
Where to Go From Here
Once one jar works, most people immediately start six more, and that is the moment to get slightly more systematic. Read the full Kratky method guide for container sizing and crop timing, then follow the Kratky lettuce walkthrough for your first full head of lettuce.
If you find you enjoy the daily ritual more than the hands off approach, an air pump and a bigger reservoir turn the same knowledge into deep water culture, which grows faster and supports bigger plants.
Frequently Asked Questions
Do I need to change the water in a Kratky mason jar? For quick crops like lettuce and herbs, no. You mix once, and the plant drinks the jar down over the crop cycle. If the solution runs out before harvest, mix a fresh batch and refill only partway, keeping the air gap.
Why is my mason jar turning green? Light is reaching the nutrient solution and algae is growing in it. Black out the jar completely with paint, foil, tape, or a sleeve, and cover any gaps around the net pot.
What size net pot fits a mason jar? A 3 inch net pot sits neatly in a wide mouth mason jar. Regular mouth jars need a 2 inch net pot or a net pot lid made for that opening.
Can I use tap water for Kratky jars? Usually, yes. Most municipal tap water works fine once nutrients are mixed in. If your water is very hard, letting it sit overnight and choosing a nutrient formulated for hard water both help.
How long does a quart of solution last? It depends on plant size and temperature, but a single lettuce or herb plant typically takes around 3 to 6 weeks to drink a quart, which lines up neatly with harvest time.
The Bottom Line
A wide mouth jar, a 3 inch net pot, hydroponic nutrients, and a fully blacked out jar are the entire recipe. Set the water so it touches the bottom of the net pot, then resist the urge to refill as the level drops, because the air gap is what makes the method work. Start with lettuce or basil and you will likely have a harvest in about a month.
Back to the step-by-step setup