Last updated: August 13, 2026
A 5 gallon bucket deep water culture build is the “hello world” of DIY hydroponics: one bucket, one air pump, one plant, and every principle of the method on display. It takes about an hour with a drill, costs less than most houseplants, and grows a tomato or basil plant that will embarrass its soil-grown siblings.
This guide is the full build, step by step: the parts list, the two holes you need to drill, the water level that keeps young roots happy, and the first-week routine that prevents nearly every beginner failure. If you want the theory behind why this works, our complete deep water culture guide covers it; this page is the workbench version.
This article contains affiliate links. If you buy through them, we may earn a commission at no extra cost to you. Learn more.
Quick Answer
How do you set up a 5 gallon DWC bucket?
- Cut a net pot hole in the lid, drill a small side hole for the air line, and run a pump-fed air stone to the bucket floor.
- Fill with nutrient solution to just touch the net pot, set pH around 5.5 to 6.5, and nest a seedling in clay pebbles.
- Run the pump 24/7, keep the bucket dark and cool, and let the water level drop below the pot as roots grow in.
The Parts List
Everything on this list is a hardware store or aquarium aisle commodity, and the only tool you truly need is a drill. A hole saw makes the lid cut clean, but careful work with a utility knife on a plastic lid gets there too.
| Part | Spec to look for | Why |
|---|---|---|
| Bucket, 5 gallon | Food-grade, dark colored, with lid | Dark plastic blocks the light that algae needs |
| Net pot | 6 inch for big plants, 3 inch for herbs and greens | Holds the plant and medium above the water |
| Air pump | Aquarium style, rated for 5 to 10 gallons or more | Runs 24/7 supplying dissolved oxygen |
| Air stone plus airline tubing | Fine-bubble stone, a few feet of tubing | Fine bubbles dissolve oxygen better than big ones |
| Check valve | Inline, matched to the tubing | Stops water siphoning into the pump at power-off |
| Clay pebbles | Enough to fill the net pot | Anchors the seedling, wicks moisture early on |
| Hydroponic nutrients | Any complete hydroponic formula | Soil fertilizer is incomplete for water culture |
| pH meter and pH down/up | Basic digital meter | Keeps the solution in the 5.5 to 6.5 window |
The net pot is the part worth matching to the plant rather than grabbing at random, since its rim diameter sets the lid hole and its depth sets how much medium the roots get.

If assembling parts sounds like a chore, complete kits bundle all of this with a pre-cut lid; our guide to the best DWC systems and kits compares the good ones. But the build below is half the fun of the method.
A complete bucket kit ships the reservoir, pre-cut lid, net pot, pump, stone, and tubing in one box.

The Build, Step by Step
The whole assembly is two holes and some tubing, and none of it is precision work. Give yourself an hour the first time, ten minutes every time after.
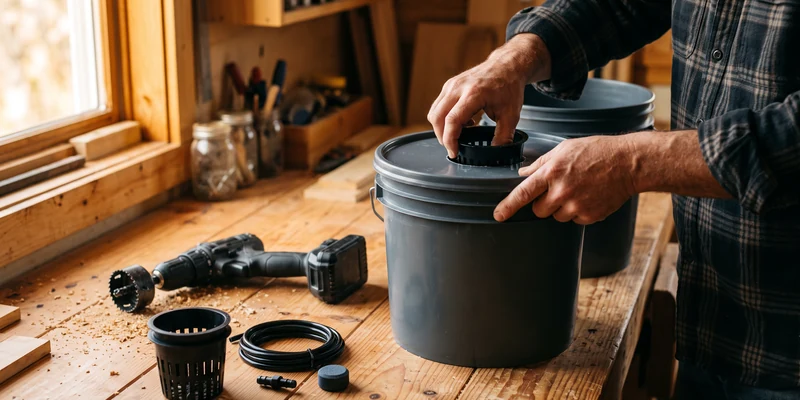
- Cut the lid hole. Trace the net pot on the lid’s center and cut just inside the line, so the pot’s lip rests on the lid without falling through. A hole saw about a quarter inch smaller than the pot’s rim diameter is the clean way; test fit as you go.
- Drill the air line hole. Drill a hole for the airline tubing high on the bucket’s side, just under the lid rim, or simply notch the lid edge. High placement keeps the hole above the waterline.
- Rig the air. Connect pump, check valve, then tubing to the air stone, with the valve’s flow arrow pointing toward the stone. Set the stone flat on the bucket floor and feed the tubing out through your hole.
- Rinse everything. Rinse the bucket, pot, and stone, and rinse clay pebbles until the water runs clear; new pebbles carry a surprising amount of dust. Our clay pebbles guide explains the prep and reuse routine.
- Mix the solution. Fill the bucket with water, add hydroponic nutrients at the label’s rate, seedling strength if your plant is small, stir, then adjust pH into the 5.5 to 6.5 range.
- Set the water level. For a new transplant, the solution should just touch the bottom of the net pot so the pebbles wick moisture upward. This single detail decides the first week.
- Plant. Nest your seedling, ideally started in a grow sponge or rockwool cube, into the net pot and surround it with pebbles so it stands straight. Bare-rooted transplants work too if you thread the roots through the pot’s slots.
- Power up and position. Plug the pump into a GFCI outlet with a drip loop in the cord, confirm a steady boil of fine bubbles, close the lid, and park the bucket out of direct sun with the pump sitting above the waterline if possible.
The air side is the one place not to improvise. A pump sold with tubing, stones, and check valves saves matching fittings across brands.

The First Two Weeks: Water Level and Watching Roots
Early success is entirely about moisture reaching the seedling before its roots reach the water. Keep the solution touching the net pot until you see white roots dangling into the reservoir, usually within one to two weeks. The bubbles bursting at the surface also splash the pot’s underside, which helps bridge the gap.
Once roots hang well into the solution, let the level fall an inch or two below the net pot and hold it there from then on. That gap keeps the plant’s crown dry, gives upper roots humid, oxygen-rich air, and is the difference between a thriving bucket and a rotting one. The reasoning and crop-specific detail live in our DWC water level guide.
Topping up and changing out
Top up with plain water or half-strength solution as the level drops between changes, then do a full drain, rinse, and refill roughly every one to two weeks. Full changes reset nutrient balance and pH drift in one move, and they matter more as the plant gets bigger and thirstier. When mixing replacement solution, add nutrients to the water before adjusting pH, in that order; our guide on how to mix hydroponic nutrients explains why the sequence matters.
What to Grow in Your First Bucket
One 5 gallon bucket suits one large plant or one enthusiastic herb. Basil is the classic first crop: fast, forgiving, and productive for months with regular trimming. A compact tomato or pepper is the more ambitious choice, spectacular by midsummer but thirsty enough to need daily attention at peak.
Lettuce grows beautifully in DWC but wastes a deep bucket’s potential, since its roots never need the depth; a shallow tote with several sites is the better lettuce tool. Whatever you pick, start from one healthy seedling, not seeds sown directly in the pebbles, and your odds improve dramatically.
Common Mistakes to Avoid
- A white or clear bucket in the light. Algae soup by week two. Dark bucket, or wrap it in something opaque.
- Water level too high for too long. Solution lapping at the stem after the roots are established invites crown rot. Drop the level once roots hang in.
- No check valve in the air line. One power cut can siphon the bucket into your pump. It is the cheapest part on the list.
- Unrinsed pebbles. The clay dust clouds the solution and coats the air stone. Rinse until clear, every reuse too.
- Soil fertilizer in the reservoir. It lacks micronutrients plants normally mine from soil and gets murky fast. Use a proper hydroponic formula.
- Turning the pump off at night. Warm, still water loses oxygen within hours, and that is how root rot starts. If roots ever brown and slime, our root rot guide is the rescue plan.
Frequently Asked Questions
What size hole do I cut for a 6 inch net pot? Slightly smaller than the pot’s rim so the lip seats on the lid; check your pot’s actual rim diameter and cut just inside it. Trace-and-test beats trusting a chart, since rim sizes vary by maker.
Can I run two plants in one 5 gallon bucket? It is not worth it. Two root systems compete for oxygen and space, and by maturity one usually strangles the other. One bucket, one plant, and add a second bucket instead.
Does the air pump really need to run all night? Yes. Dissolved oxygen falls quickly in still water, and nighttime is when nobody notices the damage starting. Budget pumps sip power, typically a few watts.
Can I use tap water? Usually, yes. Most municipal tap water works fine once nutrients are added; if yours is heavily chlorinated, letting it sit out overnight is the common precaution. Very hard water may need extra pH attention.
How often do I add nutrients? Mix full-strength solution at each full water change, every one to two weeks, and top up with plain or half-strength water in between. Feeding on top of feeding without changes is how reservoirs drift out of balance.
The Bottom Line
A 5 gallon DWC bucket is two holes, an air stone, and a net pot, built in an hour and capable of growing the biggest basil or tomato plant you have ever raised indoors. Keep the bucket dark, the pump running, the pH near 5.5 to 6.5, and the water level touching the pot only until roots reach the reservoir. Master this one bucket and every larger hydroponic system becomes a variation on a theme you already know.