Last updated: August 13, 2026
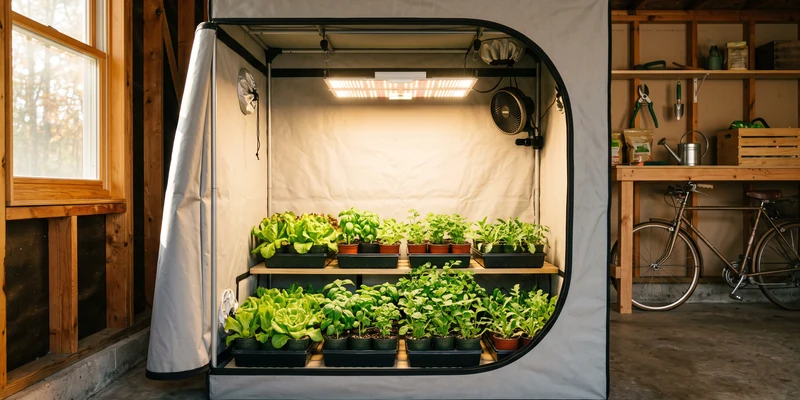
Buying a tent, a light, a fan, ducting, and hangers separately is how most people discover that three of those things do not quite fit together. That is the entire argument for grow tent complete kits: one box, matched components, and a growing space that is running the same evening it arrives. For vegetables, herbs, and seed starting, a tent turns a corner of a basement or spare room into a small climate you actually control.
This guide sorts kits by footprint, because size is the decision everything else follows from, then covers what belongs in a kit, which components are worth upgrading, and the accessories that no kit includes but every grower ends up buying. All of it is aimed at edible crops: lettuce and greens, herbs, seedlings for the spring garden, and compact tomatoes and peppers.
This article contains affiliate links. If you buy through them, we may earn a commission at no extra cost to you. Learn more.
Quick Answer
Which grow tent kit should you buy?
- For seed starting and a shelf of greens, a 2 by 4 foot kit fits two standard trays side by side and slots against most walls.
- For a proper indoor vegetable patch with tomatoes or peppers, step up to 4 by 4 feet, where the light and fan in the kit finally have something to work with.
- AC Infinity, VIVOSUN, Spider Farmer, and MARS HYDRO are the kit brands that come up again and again; the differences are in the fan, the controller, and the light.
Grow Tent Sizes Compared
Start with footprint. A tent that is too small crowds plants and cooks them under the fixture, and a tent that is too big wastes light and heat on empty floor. Here is how the common sizes map to real growing plans.
| Size | Fits | Best for | Typical light class | Watch out for |
|---|---|---|---|---|
| 2 x 2 ft | 1 tray or 1 to 2 large pots | Herbs, a single pepper, a starter setup | Compact panel, commonly around 100 watts | Heat builds fast in a small volume |
| 2 x 4 ft | 2 standard 10 by 20 trays | Seed starting, greens, microgreens racks | Bar-style or mid panel | Low ceiling height on some models |
| 3 x 3 ft | 2 to 4 medium pots | A mixed edible garden | Mid panel, dimmable | Awkward fit against narrow walls |
| 4 x 4 ft | 4 large pots or a DWC lineup | Tomatoes, peppers, cucumbers indoors | Full-size panel, commonly 200 watts and up | Needs real ventilation and floor space |
Height matters as much as floor area, especially for fruiting crops that grow upward all season. Tents commonly run from roughly five to seven feet tall, and you lose a chunk of that to the light hanging from the top bar. Measure your ceiling, then subtract for hangers and fan.
What Belongs in a Complete Kit
A genuine complete kit contains four things: the tent, a full spectrum LED, an inline fan with ducting, and the hardware to hang it all. Anything less is a bundle, and the gap will find you at 9pm on setup night.
The tent itself
Look at fabric weight, usually given in denier, with 600D a common quality marker on mainstream tents. The interior should be a reflective liner that bounces stray light back onto the plants, the zippers should be chunky rather than tiny, and the frame should be steel poles with plastic or metal corner fittings. Practical details matter more than they sound: a viewing window saves you unzipping the whole front, multiple sealed cord ports keep the light in, and a removable spill tray on the floor saves a carpet.
The light and the fan
The LED should be dimmable, full spectrum white, and rated for the tent footprint. The inline fan should be sized so it can exchange the tent’s air volume every couple of minutes, and it should have speed control, because a fan stuck on full blast in a small tent turns your plants into a wind tunnel. Fan noise is the single most common regret in this category, and it is the component most worth spending on. Our guide to fans for grow tents covers sizing properly.
Our Top Picks at a Glance
How we chose: we compared widely available complete kits on tent build quality, whether the included light is dimmable and correctly sized, fan quality and noise control, and how often the same complaints turn up in owner feedback. This is based on published specifications and user reports rather than testing of our own. Availability mattered too, since a kit is only useful if the replacement parts stay in stock.
🏆 Best Overall
An AC Infinity complete grow tent system in the 2 by 4 foot size: sturdy tent, dimmable full spectrum LED, and the CLOUDLINE inline fan with a controller that ties speed to temperature and humidity. Owners consistently point at the fan and the controller as the reason this ecosystem is worth the premium, and the automation is genuinely useful when you are away for a weekend.

🥬 Best for a Full Indoor Vegetable Garden
A VIVOSUN complete 4 by 4 foot kit, the standard way to build a real indoor vegetable patch for tomatoes, peppers, and cucumbers in one go. Light, fan, filter, ducting, hangers, and timer arrive together, which is the whole point when you are starting from an empty corner.

🌱 Best Starter Kit
A Spider Farmer 2 by 2 foot kit built around one of their compact panels. Small enough for a closet or an office corner, big enough for herbs, a tray of seedlings, or a single pepper plant, and the least intimidating way to find out whether tent growing suits you.

What No Kit Includes
Every kit leaves the same three gaps, and every grower fills them within a month. None of these are expensive, and buying them in the same order saves a second wave of shipping.
🌀 Air Movement Inside the Tent
The inline fan exhausts air, but it does not stir it. A small clip fan aimed just under the canopy strengthens stems, evens out temperature pockets, and helps pollinate tomatoes and peppers by shaking the flowers. Owners commonly call this the cheapest upgrade they made.

⏱️ A Timer You Trust
Lights on a schedule are non-negotiable, and a controller that only dims is not a timer. A basic outlet timer or a smart plug handles it; our guide to grow light timers covers the set-and-forget options.

🌡️ Eyes on Temperature and Humidity
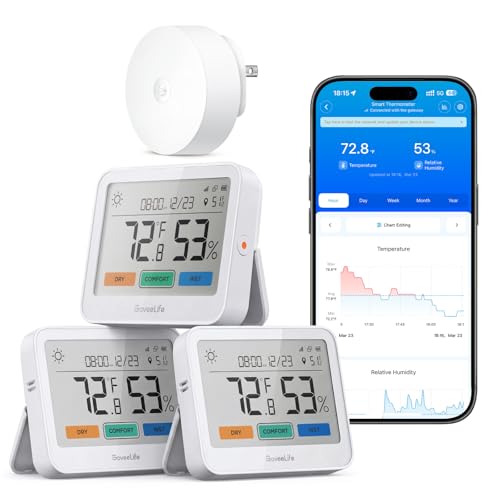
A tent is a small climate, and small climates drift. A hygrometer with a memory of highs and lows, or a connected Govee or Inkbird sensor, tells you what happened overnight instead of what is happening while you watch.
Setting Up the Tent
Assembly is straightforward, and the two things worth planning are placement and airflow direction. Put the tent somewhere with a stable base temperature, near an outlet and ideally near a window or vent where warm exhaust air can go. Basements stay cool, attics swing hard, and a spare bedroom is usually the easy answer. Leave clearance at the back for the ducting run, and do not push the tent flush against a wall.
Air moves in low and out high, since warm air rises: passive intake vents at the bottom, inline fan pulling air out of the top. Hang the light on ratchet hangers so you can raise it as plants grow, run the light’s cord through a sealed port, and keep a drip loop in every cord so water follows the cable down rather than into the plug. A GFCI outlet is sensible in any space where you carry watering cans past electronics.
Climate targets to aim for
Most edible crops sit comfortably in the range of roughly 65 to 80 degrees Fahrenheit with the lights on, and a few degrees cooler at night. Humidity around 50 to 70 percent suits seedlings and young plants, and growers commonly let it drift lower as plants mature. If your readings sit stubbornly outside those ranges, our guides to a humidifier for a grow tent and a dehumidifier for a grow tent cover when each one earns its space.
Common Mistakes to Avoid
- Buying the biggest tent you can fit. Empty floor space costs light, heat, and money. Size to the plants you will actually grow this season.
- Ignoring ceiling height. Hangers and fan eat a foot before the plant gets any. Measure vertically, not just the floor.
- Running the inline fan flat out. Constant gale-force airflow stresses plants and makes noise you will resent. Use the speed controller.
- Treating the kit light as final. Bundled fixtures vary. If it is not dimmable and rated for your footprint, it becomes the bottleneck.
- Forgetting the intake side. An exhaust fan with no open intake vents just strains against a sealed bag. Open the lower vents.
- Skipping the clip fan. No internal air movement means humid pockets, weak stems, and poor pollination on fruiting crops.
Where to Go From Here
If you are still choosing between brands, our AC Infinity grow tent review and VIVOSUN grow tent review go component by component through the two names you will see most often. If space is the constraint, our guide to the best small grow tent for starters covers the 2 by 2 class in more detail.
Once the tent is running, the growing decisions start. A tent pairs naturally with hydroponics, since the reservoir stays out of the sun and the climate stays steady; our deep water culture guide is the usual next step for tomatoes and peppers, and the LED grow light roundup helps if you decide to upgrade the fixture the kit came with.
Frequently Asked Questions
What size grow tent do I need? For seed starting and greens, 2 by 4 feet fits two standard trays. For tomatoes, peppers, or a mixed vegetable garden, 4 by 4 feet gives plants room to grow upward and outward.
Do complete grow tent kits include everything? They include the tent, light, fan, ducting, and hangers. They almost never include a timer, an internal clip fan, a thermometer, growing containers, or nutrients.
Do I need a carbon filter for vegetables? Not for odor in most edible setups. Many kits include one anyway, and it does no harm, though removing it slightly reduces the load on the fan.
Can I grow vegetables in a grow tent all year? Yes. That is the main appeal: the tent supplies light, airflow, and a stable climate regardless of season, so lettuce and herbs run continuously and seedlings start whenever you want.
How noisy is a grow tent? The inline fan is the noise source. A quality fan on a speed controller is a low hum; cheap fans whine, which is why the fan is the component most worth upgrading. See our grow tent fan guide.
Where should I put a grow tent? Somewhere with a stable temperature, an outlet nearby, and room behind it for ducting. Basements and spare rooms work well; uninsulated attics and garages swing too much in most climates.
The Bottom Line
Pick the footprint first: 2 by 4 feet for seed starting and greens, 4 by 4 feet for a real indoor vegetable garden, 2 by 2 feet to find out if this is for you. Then judge the kit on its fan and its light, since those are the parts you will live with daily. Add a clip fan, a timer, and a hygrometer, and a kit becomes a growing space that runs itself most of the week.